
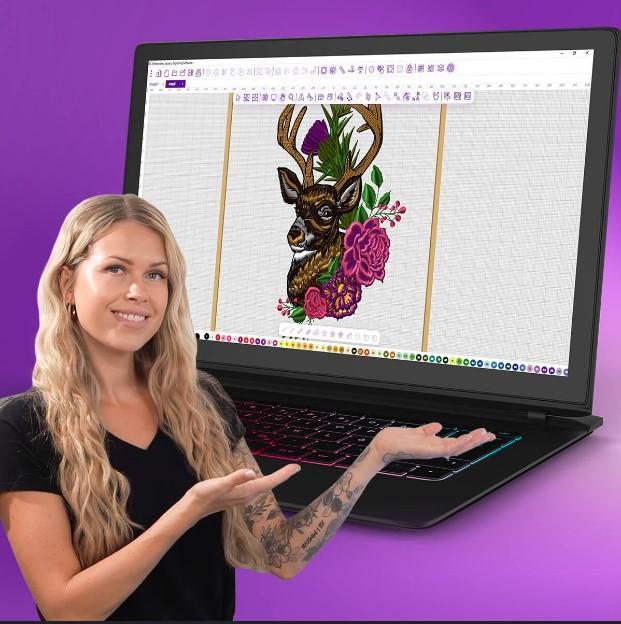

You watch the machine run. Needle plunging, thread feeding, fabric advancing. Twenty minutes ago, you loaded a DST file you received from a client. Now the logo emerging under the presser foot looks nothing like the artwork on your screen. Edges pucker. Corners round off. The text that looked crisp in the digitizing preview stitches as a wavy, illegible mess. Your thread breaks for the third time. You stop the machine, clip tails, and wonder where the breakdown happened. The breakdown happened before the file ever reached your USB drive. It happened during DST Digitizing—or rather, it happened because proper DST digitizing never occurred at all.
Professional DST digitizing is invisible when done correctly. The stitches lie flat. The corners stay sharp. The fabric shows no distortion. The design runs from start to finish without thread breaks or operator intervention. This invisibility is the point. Your customers do not admire your digitizing. They admire your embroidery. But they cannot have one without the other. This guide pulls back the curtain on professional DST digitizing techniques, revealing exactly how expert digitizers construct files that stitch cleanly, accurately, and consistently across thousands of production pieces.
What DST Digitizing Actually Means
Let us define terms clearly because the embroidery industry uses "digitizing" loosely and often incorrectly.
DST digitizing is the process of converting visual artwork into a Tajima DST file containing specific, sequential machine instructions. It is not auto-tracing. It is not format conversion. It is not renaming a PES file to .DST and hoping. It is deliberate construction—choosing stitch types, setting densities, applying pull compensation, designing underlay, and sequencing pathing—all optimized for your specific fabric, machine, and production environment.
The DST format itself is ancient by technology standards. Developed by Tajima in the 1980s, it stores stitch data in a binary format with severe limitations. Each stitch record occupies three bytes. The format supports only one needle position per stitch. Color change commands are simple numbered codes. There is no embedded thread color information, no scaling intelligence, no fabric compensation metadata. Everything the machine needs to execute the design must be encoded directly into those three-byte stitch records.
This limitation is also the format's strength. DST files are tiny, universally readable, and deterministic. Every Tajima machine manufactured in the past thirty-five years reads them. Every commercial embroidery software package exports them. They are the closest thing our industry has to a universal language. Mastering DST digitizing means mastering how to speak that language fluently.
The Technical Foundation: What Professional Digitizers Know
Professional DST digitizing rests on four technical pillars. Weakness in any pillar compromises the final stitch-out.
Pillar 1: Stitch Type Selection
Every element of your design receives a stitch type assignment. This is not automatic. It is strategic.
Satin stitches create smooth, raised borders and are ideal for text, outlines, and narrow columns. Maximum recommended width is approximately 12mm. Wider than this, satin stitches become loose and unstable. Professional digitizers split wide satin columns into multiple segments or convert them to fills.
Fill stitches cover large areas with zigzag patterns. Density, angle, and pattern type (regular, circular, radial, stippled) all affect appearance and fabric performance. Fill stitches require underlay to stabilize and pull compensation to maintain shape.
Running stitches are simple straight lines used for fine details, underlay, and tack-downs. They are also the most common source of production problems when used excessively as decorative elements. Long running stitches catch and break.
Tatami stitches (also called pattern fills) create textured backgrounds using offset, repeating patterns. They add visual interest but increase stitch count and production time significantly.
Professional digitizers do not default to one stitch type. They analyze each design element and select the stitch type that best represents that element while respecting fabric and production constraints.
Pillar 2: Underlay Engineering
Underlay is the hidden foundation of professional embroidery. It is also the most common omission in amateur digitizing.
Edge underlay runs along the perimeter of satin columns and fill shapes. It defines the boundary, prevents edges from sinking into fabric, and creates a raised profile for top stitches to rest upon.
Center underlay fills interior areas with loose, often perpendicular stitches. It stabilizes the fabric, prevents shifting during dense top stitching, and adds dimensional stability.
Zigzag underlay provides maximum stabilization for demanding fabrics like stretch knits and loose weaves. It uses wider, more aggressive stitch patterns to lock down fabric before decorative stitching begins.
Professional digitizers select underlay type, density, and stitch angle based on fabric characteristics. A design destined for stiff twill receives different underlay than the same design destined for stretch performance mesh. There is no universal underlay setting.
Pillar 3: Pull Compensation Mathematics
When your needle penetrates fabric and thread tension engages, the fabric pulls toward the center of the design. This is physics, not operator error. Your digitizer must anticipate this movement and deliberately distort the design so it pulls back to correct dimensions.
Pull compensation values are expressed in millimeters or thousandths of inches. A typical compensation range is 0.3mm to 0.8mm depending on fabric stretch, thread weight, and stitch density. Insufficient compensation produces shapes that appear "pulled in"—circles become ovals, rectangles pinch at corners. Excessive compensation produces shapes that bulge outward.
Professional digitizers do not apply uniform compensation across entire designs. Vertical elements may require different compensation than horizontal elements. Dense fill areas require more compensation than open running stitches. The most sophisticated digitizing software allows independent X and Y compensation values.
Pillar 4: Pathing and Sequencing
The order your machine stitches design elements directly impacts production efficiency and embroidery quality.
Color-based sequencing groups all areas of the same color together, minimizing thread changes. This seems obvious, yet auto-digitized files frequently scatter same-color elements throughout the stitch sequence.
Travel minimization reduces jump stitches between discrete design elements. Each jump represents time and thread waste. Professional digitizers plan stitch paths to move logically from one area to the next without backtracking.
Stitch angle sequencing considers how adjacent fill areas interact. Stitching two adjacent fill areas at identical angles creates an unattractive visible seam. Professional digitizers offset angles slightly or use opposing directions to create visual separation.
Registration preservation sequences elements from background to foreground. Underlay stitches first, then large background fills, then mid-tone elements, finally top details and borders. This layering approach ensures each element sits properly atop previous stitching.
Software Settings That Separate Pros from Amateurs
Professional digitizers do not use default settings. They configure their software deliberately for each design.
Density calibration: Default density values are starting points, not rules. Professional digitizers adjust density based on thread weight, fabric thickness, and desired hand feel. Thicker threads require lower density. Thinner fabrics require lower density. Looser weaves require higher underlay density and potentially lower top stitch density.
Pull compensation curves: Advanced software allows compensation to vary across curved shapes. Corners may require different compensation than straight edges. Professional digitizers map compensation strategically rather than applying uniform values.
Corner sharpening: Satin stitches naturally round off sharp corners. Professional digitizers use corner sharpening techniques—adding extra stitches, adjusting entry and exit points, or splitting corners—to preserve angular geometry.
Short stitch minimization: DST files handle short stitches poorly. Under approximately 0.5mm, stitches become unstable and prone to thread breaks. Professional digitizers identify and eliminate excessively short stitches, either by merging adjacent points or redesigning problematic elements.
Trimming strategy: Every thread trim creates tails that require clipping and increases production time. Professional digitizers minimize trims by planning continuous stitch paths where possible, while also recognizing when strategic trims improve appearance by eliminating long, unsightly jump stitches.
Fabric-Specific Digitizing: One File Does Not Fit All
This is the most important concept in professional DST digitizing, and the most frequently ignored.
Woven fabrics (cotton, linen, twill, denim): Relatively stable. Moderate pull compensation. Standard underlay. Medium density. These are the easiest fabrics to digitize for and the most forgiving of marginal files.
Knit fabrics (pique, jersey, interlock, performance mesh): Stretchy. High pull compensation required, especially horizontally. Aggressive underlay essential. Lower density recommended to maintain fabric drape. Professional digitizers often reduce density by 10-20% compared to wovens.
Cap backs: Dense, structured, curved surface. Special cap digitizing techniques required. Design proportions must adjust for visual correction on curved surface. Pull compensation different from flat embroidery. Underlay essential but must not create excessive bulk.
Towel and terry: Highly absorbent, napped surface. Water-soluble topping required. Stitch density typically reduced. Underlay designed to anchor stitches without disappearing into nap. Fine details and small text perform poorly.
Leather and vinyl: Non-forgiving, no grain. No underlay (permanent needle holes). Reduced density. No pull compensation (material does not stretch). Perforation risk requires careful design placement.
Sheer fabrics (organza, voile, net): Visible from both sides. Backing thread shows through. Reduced density. Careful tension matching. Underlay must be minimal or invisible.
Professional digitizers ask about fabric before they create your file. If your digitizer does not ask, they are guessing. Your results will reflect their guesswork.
The Test Stitch Discipline
Professional DST digitizing includes test stitching as an integral workflow step, not an optional verification.
Test on production-equivalent fabric. A file tested on stiff twill and produced on stretch pique will fail. The test fabric must match production fabric in weight, stretch, and weave.
Test with production thread. Different thread brands exhibit different tension characteristics. A file tested with Madeira may behave differently with Isacord or Marathon. Test with the actual thread you will use in production.
Test with production stabilizer. Cutaway, tearaway, washaway, and fusible stabilizers all affect stitch formation. Your test conditions must replicate production conditions exactly.
Measure against artwork. Place test stitch-out next to original artwork. Evaluate proportion, detail preservation, and color accuracy. If the test does not match the art, revise the file.
Document approved samples. Physical approved samples become your quality benchmark. When production pieces drift from sample standards, you have objective evidence to demand correction.
Common DST Digitizing Failures and Their Causes
Puckering: Insufficient underlay, excessive density, inadequate pull compensation, or unstable fabric stabilization. Usually a combination of multiple factors.
Thread breaks: Excessive density, incorrect needle size, poor tension settings, or stitch angles that concentrate too many penetrations in small areas. Also caused by excessively short stitches.
Design distortion: Inadequate pull compensation, incorrect hooping tension, or unstable stabilizer. Sometimes caused by digitizing at one size and scaling to another without recompensating.
Visible fabric between stitches: Density too low for thread weight and fabric combination. Or incorrect stitch type selection for element width.
Registration errors between colors: Missing underlay, insufficient pull compensation, or unstable fabric. Also caused by poor hooping technique.
Gaps between adjacent color areas: Pull compensation settings mismatched between adjacent elements. Or design constructed with insufficient overlap.
Professional vs. Amateur: The Quality Gap
Amateur digitizers create files that stitch eventually. Professional digitizers create files that stitch efficiently, repeatedly, and beautifully across thousands of pieces.
Amateurs ask: "Does this file run?"
Professionals ask: "Does this file run optimally?"
Amateurs check: "Are all the shapes traced?"
Professionals check: "Are the paths clean and node-efficient?"
Amateurs set: "Default density and compensation."
Professionals set: "Fabric-specific parameters optimized for this exact design."
Amateurs deliver: "A DST file."
Professionals deliver: "A production solution."
The gap is not mysterious. It is training, experience, and attention to detail. Professional digitizers have spent hundreds or thousands of hours at the intersection of software and sewing machine. They have broken thread, puckered fabric, and distorted designs so you do not have to. Their expertise is embedded in every clean, accurate stitch-out their files produce.
When to Invest in Professional DST Digitizing
You do not need professional digitizing for every design.
Digitize internally when:
-
Designs are extremely simple
-
You are sampling and iterating rapidly
-
You have invested in training and accept the learning curve
-
Production volumes do not justify outsourcing costs
Outsource professionally when:
-
Customer logos and brand assets require perfect reproduction
-
Designs include small text or fine details
-
Fabric is challenging (stretch, nap, sheer)
-
Production runs exceed fifty pieces
-
Your internal digitizing consistently underperforms
The economic reality: Professional DST digitizing costs $15 to $50 per design. A single ruined garment costs more than that. A single dissatisfied customer costs much more. For commercial embroidery businesses, professional digitizing is not an expense. It is insurance against production failures and quality complaints.
Conclusion: The Invisible Art of Professional DST Digitizing
When DST digitizing is done professionally, no one notices. The embroidery runs without interruption. The logo lies flat and sharp. The fabric shows no distortion. The customer receives their order on time and returns for the next one. Success is invisible.
When DST digitizing is done poorly, everyone notices. The operator fights thread breaks. The supervisor rejects finished pieces. The customer complains about quality. The reorder never comes. Failure is visible, costly, and entirely preventable.
Professional DST digitizing is not about fancy software or expensive plugins. It is about understanding what happens when needle meets fabric and thread engages tension. It is about anticipating physical forces and compensating mathematically. It is about selecting stitch types not for how they look on screen but for how they perform in production. It is about testing, revising, and testing again until the file delivers consistent, predictable results.
The machine only follows instructions. The thread only behaves according to physics. The fabric only responds to tension. Your DST file is the bridge between your creative vision and these mechanical realities. Build that bridge with professional techniques, and your embroidery will cross it cleanly, accurately, and repeatedly.
Build it poorly, and everything crashes in the gap. The choice is yours. Now you know exactly what professional construction requires.
